Recipe Video
The High Protein Pantry Staple I Grew Up Eating
If you grew up in a Chinese or Southeast Asian household, meat floss needs no introduction. It was just always there. A jar of it on the counter, a scoop on top of congee in the morning, folded into rice, spread on toast with butter or mayo. One of those background ingredients that you ate constantly without ever really thinking about it until you moved out and realized how much you missed it.

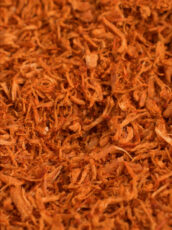
Meat floss, or 肉鬆 (ròu sōng), is exactly what it sounds like. Pork that has been braised until completely tender, shredded down to individual fibers, seasoned, and then dried slowly over low heat until every strand is light, fluffy, and shelf-stable at room temperature. The texture is somewhere between cotton candy and a very dry pulled pork. Light, slightly sweet and savory, and somehow both substantial and weightless at the same time.
You can find it at virtually any Asian grocery store. But most commercial versions are made with significant amounts of flour, starch, and other fillers that give them that ultra-fluffy, voluminous appearance while simultaneously making the macros undesirable.
This version is different. Just pure lean pork with some seasonings.
The Macro Case
One kilogram of pork tenderloin produces roughly 250 grams of finished meat floss after the moisture has been cooked out which contains around 210 g of protein. The drying process removes the water weight while concentrating the protein content, meaning the finished floss has a dramatically higher protein density per gram than the raw pork it came from.
A tablespoon of homemade meat floss on top of congee or rice adds a meaningful hit of protein to what would otherwise be a carbohydrate-heavy meal. Spread on toast with Kewpie mayo it becomes a quick high protein snack. Mixed into a rice bowl with a soft boiled egg it becomes a complete meal.
Pork tenderloin is the most economical protein to use for this recipe and produces the best texture. But the same method works with chicken breast, lean beef, or even a firm white fish like cod or tilapia for those who don’t eat pork. The braising time and drying time may vary slightly but the principle is identical.
The Two Things That Actually Matter
This recipe is genuinely forgiving in most respects. The braising step is hard to mess up as long as you give it enough time. The seasoning is flexible and can be adjusted to taste. The drying step is long but mostly hands-off.
There are only two things that can genuinely go wrong:
Shredding too coarsely. The pork needs to be shredded down to individual fibers, not pulled into chunks. Coarse shreds produce dried clumps after the drying step that are hard to eat and unpleasant in texture. Using a pestle to smash the braised meat apart before shredding is the most effective way to break the fibers down fine enough. The goal is wispy, hair-like strands, not pulled pork.
Drying on too high heat. Low heat throughout the entire drying process is non-negotiable. The sugars in the seasoning burn quickly and scorched meat floss is bitter and unpleasant. Low heat, constant stirring, and patience is the only way to get an evenly dried, light, fluffy result. If the bottom of the pan is browning faster than the floss is drying, the heat is too high.
Everything else in this recipe is forgiving. Get these two things right and the rest takes care of itself.
Meat Floss Recipe
Ingredients
Pork
- ~1 kg pork tenderloin
Braise
- 1 onion, halved
- 2-3 cloves garlic
- 2-3 slices ginger
- 1 scallion white
- 1 tsp white peppercorns
- 3 tbsp Shaoxing wine
Seasoning
- 3 tbsp soy sauce
- 1 tbsp dark soy sauce
- 1 tbsp sugar
- 1 tsp MSG
Instructions
Step 1: Prep the Pork
Remove any visible fat and sinew from the pork tenderloin and slice into ¾ inch medallions. Fat and connective tissue do not dry well and will produce an unpleasant, waxy texture in the finished floss. Take the time to trim thoroughly.

Step 2: Blanch
Place the pork medallions in a pot of cold water and bring to a boil. Blanch for 10 minutes then drain and discard the water. This step removes impurities and blood from the meat that would otherwise cloud the braising liquid and add off flavors to the finished floss.
Step 3: Braise
Return the pork to the pot with fresh cold water to cover. Add the onion, garlic, ginger, scallion white, white peppercorns, and Shaoxing wine.
Bring to a simmer and braise for about 1 hour until the pork is completely fall-apart tender and pulls apart easily with no resistance. The pork needs to be genuinely overcooked by normal standards. If it still has any chew, it needs more time.

Drain and let cool slightly before shredding.
Step 4: Shred
Using a pestle or the back of a heavy spoon, smash each medallion to break apart the muscle fibers. Then shred the pork by hand or with two forks, working the fibers apart until you have fine, wispy strands throughout. No large chunks should remain.

This step determines the final texture of your floss more than anything else. Take your time and shred as finely as you can. Coarse shreds become hard, unpleasant clumps after drying.
Step 5: Season
Add the soy sauce, dark soy sauce, sugar, and MSG to the shredded pork and toss to coat evenly. Taste and adjust if necessary. The seasoning should be slightly more assertive than you want the finished floss to taste, as the flavor concentrates during the drying step.
Step 6: Dry
Transfer the seasoned pork to a large pan or wok over low heat. Stir continuously for about 45 minutes until every strand is completely dry, light, and fluffy. The floss is ready when it looks and feels like cotton and no moisture remains. It should be light enough to float slightly when you lift a handful and let it fall.

Do not rush this step with higher heat. Low and slow is the only way to dry the floss evenly without scorching. Keep stirring constantly and keep the heat at its lowest setting throughout.
Step 7: Cool and Store
Spread the finished floss on a tray and let cool completely before storing. Store in an airtight jar at room temperature for up to 1 month or in the fridge for several months.

Meat Floss (肉鬆)
20
servings30
minutes40
minutesIngredients
- Pork
1 kg pork tenderloin
- Braise
1 onion, halved
2-3 cloves garlic
2-3 slices ginger
1 scallion white
1 tsp white peppercorns
3 tbsp Shaoxing wine
- Seasoning
3 tbsp soy sauce
1 tbsp dark soy sauce
1 tbsp sugar
1 tsp MSG
Directions
- Prep the Pork
- Remove any visible fat and sinew from the pork tenderloin and slice into ¾ inch medallions. Fat and connective tissue do not dry well and will produce an unpleasant, waxy texture in the finished floss. Take the time to trim thoroughly.
- Blanch
- Place the pork medallions in a pot of cold water and bring to a boil. Blanch for 10 minutes then drain and discard the water. This step removes impurities and blood from the meat that would otherwise cloud the braising liquid and add off flavors to the finished floss.
- Braise
- Return the pork to the pot with fresh cold water to cover. Add the onion, garlic, ginger, scallion white, white peppercorns, and Shaoxing wine.
- Bring to a simmer and braise for about 1 hour until the pork is completely fall-apart tender and pulls apart easily with no resistance. The pork needs to be genuinely overcooked by normal standards. If it still has any chew, it needs more time.
- Drain and let cool slightly before shredding.
- Shred
- Using a pestle or the back of a heavy spoon, smash each medallion to break apart the muscle fibers. Then shred the pork by hand or with two forks, working the fibers apart until you have fine, wispy strands throughout. No large chunks should remain.
- This step determines the final texture of your floss more than anything else. Take your time and shred as finely as you can. Coarse shreds become hard, unpleasant clumps after drying.
- Season
- Add the soy sauce, dark soy sauce, sugar, and MSG to the shredded pork and toss to coat evenly. Taste and adjust if necessary. The seasoning should be slightly more assertive than you want the finished floss to taste, as the flavor concentrates during the drying step.
- Dry
- Transfer the seasoned pork to a large pan or wok over low heat. Stir continuously for about 45 minutes until every strand is completely dry, light, and fluffy. The floss is ready when it looks and feels like cotton and no moisture remains. It should be light enough to float slightly when you lift a handful and let it fall.
- Do not rush this step with higher heat. Low and slow is the only way to dry the floss evenly without scorching. Keep stirring constantly and keep the heat at its lowest setting throughout.
- Cool and Store
- Spread the finished floss on a tray and let cool completely before storing. Store in an airtight jar at room temperature for up to 1 month or in the fridge for several months.
Tips
- Trim the pork thoroughly. Fat and sinew are the enemy of good floss. Any connective tissue left on the pork will not dry properly and produces tough, unpleasant bits throughout the finished product. Five extra minutes of trimming saves the whole batch.
- Shred finer than you think you need to. The most common mistake first-timers make is leaving the shreds too coarse. The finer the shred going into the wok, the lighter and fluffier the finished floss coming out. Use the pestle aggressively before you start shredding by hand.
- Keep the heat low throughout drying. The sugar in the seasoning burns quickly. A medium heat that seems manageable at the start will scorch the bottom of the pan by the halfway point. Start low and stay low.
- Stir constantly. The drying is even and the floss stays light only if every strand is constantly moving. Stopping for more than a minute allows the bottom layer to dry faster than the top and creates uneven texture throughout.
- Cool completely before storing. Any residual warmth trapped in a sealed jar creates condensation that reintroduces moisture and shortens the shelf life significantly. Spread it out, let it cool fully, then store.
How to Use Meat Floss
- On congee — the most traditional application, spooned generously over a bowl of plain congee with a drizzle of sesame oil and some scallion
- On rice — a scoop on top of steamed rice with a soft boiled egg and a drizzle of soy sauce is a complete meal in under 5 minutes
- On toast — spread Kewpie mayo on toast and pile meat floss on top. One of the best quick snacks in the Chinese pantry
- In onigiri — a classic Japanese-Chinese fusion filling that has been popular in both countries for decades
- On steamed egg — spooned over a silky steamed egg custard with soy sauce and sesame oil
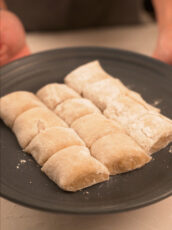
- In congee porridge balls — rolled into sticky rice balls as a filling for a traditional Chinese snack
- As a protein topping — on any bowl, salad, or noodle dish that needs a hit of savory, high protein texture
Final Thoughts
Meat floss is one of those pantry staples that once you make from scratch, the store-bought version stops making sense. The homemade version is leaner, more flavorful, and made from exactly what it says it is. Pure pork. Nothing else.
It takes about two hours of mostly hands-off time and produces a jar of something that makes every meal it touches significantly better. That is a very good return on a kilogram of pork tenderloin and an afternoon of low heat stirring.
Make a batch. Keep it on the counter. Reach for it constantly.